Happy Halloween Everyone! In honor of this spooky holiday, I thought it only fitting to feature a truly vintage Halloween inspired dessert table. So what do you think, Trick or Treat?!
To create the perfect vintage Halloween look, the design team utilized a mix of antique books, cameras, medicine bottles, and old documents. As well as an old clock and typewriter, shutters, and window panes.
Interested in recreating some of these delicious treats? Head over to Hostess {With the Mostess} for all the details!
Compliments:
Source: Hostess
Monday, October 31, 2011
Trick or Treat : A Vintage Halloween Dessert Table
Sunday, October 30, 2011
A Molly Production
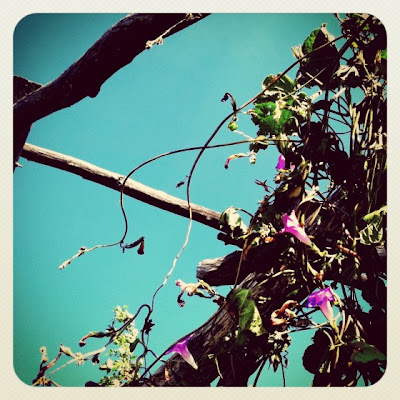
So I must share with you all a jaw dropping, gorgeous photography blog; A Molly Production. Not only is the creative genius behind these works of art my long time college roomie, but is also one of my beautiful BFF's! Every photo is sure to leave you saying "WOW!", they are beyond stunning.
I couldn't be more proud or impressed Molly! XO
To check out more gorgeous images or to get into contact with Molly, head over to A Molly Production.
Compliments:
Photography: A Molly Production
I couldn't be more proud or impressed Molly! XO
To check out more gorgeous images or to get into contact with Molly, head over to A Molly Production.
Compliments:
Photography: A Molly Production
DIY Dipped Marshmallow Pops
How adorable are these little marshmallow treats for the dessert table?! Not only are they delicious but are also an easy and budget-savvy DIY;
What you will need:
(Ingredients needed for 25 pops)
Begin by preparing your area; line a baking sheet with parchment paper, place lollipop sticks/straws into the center of each marshmallow, and pour sprinkles onto plates (a plate for each kind of sprinkle).
Next, melt chocolate chips in a small, uncovered, microwave-safe bowl following the package directions. Stir. Then, stir in oil as this will help to keep the chocolate fluid. Next, dip marshmallows halfway into the melted chocolate; shake off excess.
Then, roll chocolate covered marshmallows in sprinkles.
Place marshmallows onto lined baking sheet and let set for at least 30 minutes.
Cute right?! Use different colors and kinds of sprinkles to fit into your wedding theme! Try packaging the marshmallow treats in decorative bags or by placing each pop onto a cupcake liner.
Compliments:
Source: Nestle Kitchens
What you will need:
(Ingredients needed for 25 pops)
- Parchment or wax paper
- 25 sip stick straws (coffee stirrers) or lollipop sticks
- 25 large marshmallows
- Candy sprinkles
- 1 cup any flavor chocolate chips
- 1 teaspoon vegetable oil or vegetable shortening
___________________________
Next, melt chocolate chips in a small, uncovered, microwave-safe bowl following the package directions. Stir. Then, stir in oil as this will help to keep the chocolate fluid. Next, dip marshmallows halfway into the melted chocolate; shake off excess.
Then, roll chocolate covered marshmallows in sprinkles.
Place marshmallows onto lined baking sheet and let set for at least 30 minutes.
Cute right?! Use different colors and kinds of sprinkles to fit into your wedding theme! Try packaging the marshmallow treats in decorative bags or by placing each pop onto a cupcake liner.
Compliments:
Source: Nestle Kitchens
Labels:
Budget Savvy,
delectable desserts,
DIY
Friday, October 28, 2011
Chic Halloween Wedding
Halloween weekend has arrived, and what a better way to kick off the spooky festivities than with a fabulously-chic Halloween inspired wedding! Style and design from the talented Blue Moon Events, this wedding is far from frightening with a glamorous color palette featuring silvers, deep blues, and goldenrod yellows. Talk about a chic twist on the traditional ghoulish holiday, love it!
Compliments:
Source: The Sweetest Occasion
Style & Design: Blue Moon Events
Photography: Heather Forsythe Photography
Labels:
Fall Wedding,
Halloween Wedding,
Inspiration,
Shabby-Chic
Tuesday, October 25, 2011
DIY Burlap Banner
I absolutely adore when brides incorporate banners into their engagement pictures and/or wedding. So of course for my recent E-session I couldn't resist getting a little crafty and making my own DIY banner;
What you will need:
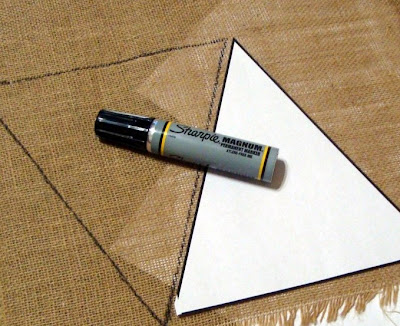
Step 1: Create a flag stencil with a marker and straight-edge.
Step 2: Using the flag stencil and marker, outline the stencil onto the burlap.
Step 4: Once triangles have been outlined, use a sharp scissors to cut out the triangle shapes.
Step 5: Repeat steps 1-4 on the lace fabric. However, be sure to create a smaller sized flag stencil for this fabric.
Step 6: Use a hot-glue gun to apply small lace triangles to the larger burlap triangles.
TIP: Use small bead sized amounts of the hot-glue to fasten the fabric.
Step 7: Once hot-glue has dried, turn the triangles face down. Then glue a string of the twine to the back of the flags.
Step 8: Use stencil letters to trace out a desired saying onto the colored fabric.
Saying ideas: "Save The Date", "Just Married", "Mr. & Mrs.", "Newly Weds", "Thank-You", "Hitched", "Here Comes The Bride", your names, your wedding date, etc..
Step 9: Cut out letters and hot-glue them onto the flag banner.
Step 10: Let dry and ENJOY!
What you will need:
- Burlap
- Lace Fabric
- Colored Fabric
- Letter Stencils
- Sharp Scissors
- Hot-Glue Gun
- Hot-Glue Sticks
- Twine
- Marker
Step 1: Create a flag stencil with a marker and straight-edge.
Step 2: Using the flag stencil and marker, outline the stencil onto the burlap.
Step 4: Once triangles have been outlined, use a sharp scissors to cut out the triangle shapes.
Step 5: Repeat steps 1-4 on the lace fabric. However, be sure to create a smaller sized flag stencil for this fabric.
Step 6: Use a hot-glue gun to apply small lace triangles to the larger burlap triangles.
TIP: Use small bead sized amounts of the hot-glue to fasten the fabric.
Step 7: Once hot-glue has dried, turn the triangles face down. Then glue a string of the twine to the back of the flags.
Step 8: Use stencil letters to trace out a desired saying onto the colored fabric.
Saying ideas: "Save The Date", "Just Married", "Mr. & Mrs.", "Newly Weds", "Thank-You", "Hitched", "Here Comes The Bride", your names, your wedding date, etc..
Step 9: Cut out letters and hot-glue them onto the flag banner.
Step 10: Let dry and ENJOY!
Labels:
Antique Door Vintage Rentals,
Budget Savvy,
Burlap,
DIY
Monday, October 24, 2011
DIY Apple Cider Cups
Do I have a treat for y'all today; An apple inspired DIY that is perfect for any fall wedding!
What you will need:
Paring Knife
Large Spoon or Melon Baller
Large Apples
Lemon Juice
Apple Cider
Garnish Options: Cinnamon sticks, whole cloves, allspice, or star anise.
Instructions:
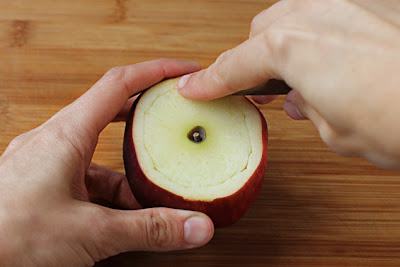
On a cutting board, begin by using a knife to cut off the top of an apple. Then use a paring knife to carefully outline the "rim" of the apple cup, I recommend a 1/4" wide rim. Next, use a large spoon or melon baller to scoop out the center of the apple until you have a nice sized "cup". While hollowing out the apple, be mindful not to get too close or cut through the bottom/sides of the apple as this will cause the cider to leak! Once the inside of the apple has been hollowed out, brush lemon juice over the inside of the apple to prevent browning. Lastly, fill with apple cider, garnish, serve, and enjoy!
TIP: If an apple doesn’t sit exactly level, take a paring knife and slice off a few millimeters from the bottom to even off.
Compliments:
Source: Gimme Some Oven
Labels:
delectable desserts,
DIY,
Drinks,
Fall Wedding
Friday, October 21, 2011
Rustic Fall Tablescape
How gorgeous is this fall inspired shoot featuring the talented Jane Guerin, Flowers and Korie Lynn Photography?! I am obsessing over the tree stump plate chargers and array of vintage bottles used for flowers!
Compliments:
Floral Design: Jane Guerin, Flowers
Photography: Korie Lynn
Source: Love and Lavender
Compliments:
Floral Design: Jane Guerin, Flowers
Photography: Korie Lynn
Source: Love and Lavender
Labels:
Fall Wedding,
floral,
Inspiration,
Rustic,
Styled Shoot
Subscribe to:
Comments (Atom)


