Sunday, October 9, 2011

Be Inspired


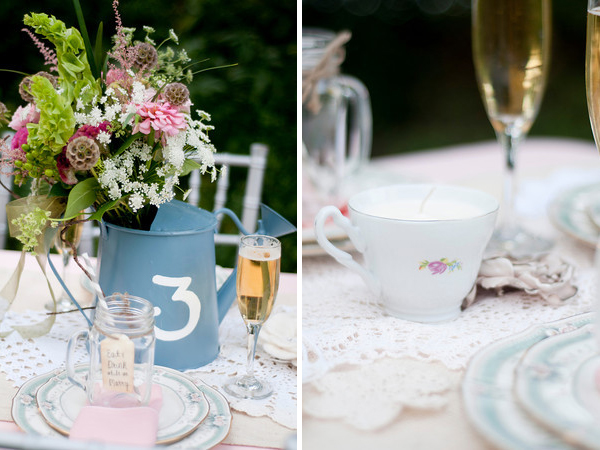
I simply adore this photo and throughout my planning process I have used it as my inspiration. It captures everything that Daniel and I invision for the big day, a charming mix of rustic and vintage detail.

The biggest piece of advice that I can offer based upon my planning experience thus far, is to find something that inspires you. With your inspiration in hand, all other details are able to start falling into place. 

Saturday, October 8, 2011

DIY Glitter Pumpkins

Being the girlie girl that I am, I love glitter! So naturally I am obsessing over today's DIY that combines sparkle and pumpkins...talk about a glitzy fall wedding decoration! Oh and did I mention, it's super easy?!

{Source}

What you will need:

Pumpkins (Real or Artificial)
Glitter
Foam Brush
Elmer's Glue
Newspaper
Paper Plate

Step 1: Prepare your area since this project can get a little messy. I recommend laying down a few sheets of newspaper. 

Step 2: Place a pumpkin onto a paper plate. Using your foam brush, "paint" a thin layer of glue over the surface of the pumpkin and let dry. 

Step 3:  Apply a second coat of glue to the surface of the pumpkin (By applying two coats of glue it will create a more even base).

Step 4: Using a spoon, shift glitter onto the wet surface of the pumpkin until covered completely.

Step 5: Let dry for at least 1 hour. Then shake off any excess glitter. 

You can leave the stem as-is or get creative, I suggest using a different color of glitter or paint on the stem!

{Source}

{Source}

{Source}

 For a great video tutorial on how to glitter pumpkins head over to Art Glitter!

Fairytale Garden Inspiration

Wednesday, October 5, 2011

DIY Tin Can Lanterns

Today I have a budget savvy DIY that I guarantee will add the perfect touch of ambiance to your rustic-chic wedding! I couldn't be more excited to share this DIY with you all because it is not only super inexpensive but beyond simple to make, no special tools or materials necessary! 

What you will need:

Tin Cans
Marker
Hammer
Nail
Candles

Step 1: Collect a range of various sized tin cans and carefully detach the lids. Be sure to clean the cans of any remaining food remnants and soak to remove the labels.

Tip: Apply some Goo Gone to the sticky stuff still on the can and it should come right off!

Step 2: Fill the cans with water and freeze.

Tip: I got a little too excited and started on my cans before completely frozen, so I recommend leaving them to freeze overnight to ensure they are fully frozen!

Step 3: Remove one can at a time from freezer and place on a towel.  Using a marker draw out a dotted pattern of your choice. Be creative, anything from hearts, monograms, to table numbers will look beautiful!

Step 4: Using a hammer and nail punch out the pattern.

Tip: Begin nailing at the bottom of the can; as you get towards the top ice tends to start chipping away.  Also, ice will start to melt around the edges so you may need to put the can you are working on back in the freezer for a bit and begin on another can. 

Step 5: Once you have completed the patterns, place the frozen cans in the sink to thaw and wash off any visible marker.  

Tip: Running hot water over your can will help speed up the melting process!

Step 6: Add a votive to cans and light!


 Tin lanterns, or "pierced wear" were hugely popular during the Colonial era.  Sometimes even referred to as "poor man's silver" due to the inexpensiveness of the material. So for a present day bride on a budget, history will attest that this is a fabulous bargain as well as a gorgeous table topper!

{Source}
{Source}

Compliments:
Source: Charlotte Hupfield Ceramics
Source: Ruffled

Sunday, October 2, 2011

Canister Centerpieces


 I have always been drawn to kitchen canisters. I just love the beautiful detail and uniformity of a set!  So I got top thinking; besides giving your kitchen counter some charm, kitchen canisters would also make PERFECT centerpieces for a shabby-chic wedding! The varying sizes makes for a fabulous visual display and the uniformity of each set helps give the arrangement a clean look.  With so many design, style, and color options finding the perfect sets to match your wedding theme is easy. 

Try using canisters as flower vases, "as is" for a unique visual display, as candle holders, or a table number display... the options are endless!

{Source}


{Source}


{Source}

 
{Source}  

 
{Source}

Saturday, October 1, 2011

Decorating With Doilies

On this wonderful first day of October I stopped by a yard sale.  It was one of those that "pickers" just love, full of great antiques! While there I came across a small box of doilies, yes doilies. I know what you're thinking but let me tell you, doilies are not just for Grandma anymore! These little vintage beauties have so much to offer a wedding.  From table centerpieces to invitations, the uses for a doily are endless! They can be found at antique stores, flea markets, yard sales, and even online. Some tend to run a little pricey so for a more budget conscientious alternative paper doilies are available! Here are some great ways to incorporate this vintage staple into your big day:

{Source}
{Source}
{Source}
{Source}
{Source}
{Source}
{Source}
{Source}
{Source}
{Source}
{Source}

Antique Door Vintage Rentals has a small collection of vintage doilies available to Twin Cities brides for rental!